- Author Caroline Forman forman@fiestaleisure.com.
- Public 2023-12-16 11:46.
- Last modified 2025-01-23 09:54.
For friends and family, you don't want to buy meaningless trinkets and regular toilet water for your birthday. Original and stylish gifts are quite expensive. If it so happens that at the moment you cannot afford to buy a thing worthy for a present to a loved one, do it yourself.

It is necessary
- - thick cardboard box;
- - picture;
- - acrylic paints;
- - varnish-crackle;
- - protective varnish;
- - decorative details.
Instructions
Step 1
Caskets and boxes of different stripes and sizes will always find their place in any home. They are needed both by the grandmother-needlewoman, and by the dad under his bolts-nuts, and by the mother for her jewelry. The girl will be happy to put her “treasures” in a bright box. A friend will place a stylish pipe box on the coffee table.
Step 2
Choose the design of your gift, focusing on the tastes of the person to whom the gift is intended. Pictures can be found on the Internet and printed on a printer, you can pick up a pattern from a napkin, you can buy a beautiful postcard. A colorful cover from a used notebook, bright packaging will do.
Step 3
For the base, take a box from a mobile, player or other strong container of suitable size. Look at the selected picture, at its primary colors. Take acrylic paints in two shades that match the tone of the picture. One color will be the main one, and the second will show through the cracks in the crackle varnish.
Step 4
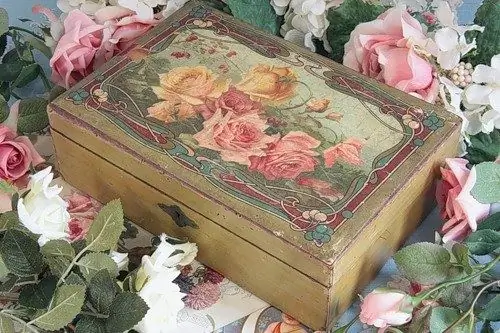
Place the picture on the lid and trace around it with a marker while setting the drawing aside. You will make the box using the craquelure technique, it consists in imitating an old cracked surface. Apply a layer of paint that will be visible from under the base. Leave the place where the picture will be free. Wait for the paint to dry.
Step 5
Take your craquelure varnish and read the instructions very carefully. Apply the product with a brush, strokes that do not overlap. The thicker the varnish layer, the larger the crack, while the thinner one gives a fine mesh of cracks. Wait one day. Take the base paint color and apply it over the varnish with light strokes. Cracks will not be slow to appear.
Step 6
Cover your craft with a layer of protective varnish on top. This is done so that the crackle flakes do not fall off. Now take a picture and stick it on the space provided for it with PVA glue. It is better to arrange the picture in a frame. Choose the material according to the style of the box and the picture. A tree, decorative cord, hemp rope, satin ribbon, beaded beads and other original gizmos will do.
Step 7
Glue the frame and other decorative details. The box can be decorated with buttons, satin flowers, small soft toys, bows, brooches. Show your imagination and make a unique gift for the birthday boy.


